Hi I'm Hamish. This is a documentation of my wonderful adventures as I make my way from a flailing animation student, to a powerful and successful art ninja (I hope.) I'll be posting my work from Animation College NZ fairly regularly (at least that's the plan) as well as my own personal work. So hold onto your socks or they may get blown off. If you like what you see, good for you. Hopefully there'll be more soon enough.
By the way here's some shameless self advertising. Deviantart Portfolio (basically the same stuff but whatevs) Youtube
Aiit.
It has come to my attention that this blog has been dead for a while.
I have been doing stuff I swear!!
So here's the next massive work dump.
Who am I even talking to? No one cares...
*sobs in corner*
HERE GOES!!
So to start off I imported my turnaround into Maya as image planes that I could use as reference while I modeled Diego. (Holy balls this was so long ago).
I started with simple shapes like spheres and cylinders and then edited the edges, faces, and vertices to create the shapes I wanted. Then I added more shapes and started to create details like the nose, mouth, and hair.
I slowly got more end more complex with my shapes to create more interesting and technical parts. I still made sure to keep my topology clean and precise.
To save time and pointless modeling I duplicated/mirrored parts from the character's right side to his left. In the picture you can see that the duplicated limbs went black. This is because the normals (the faces that make up the object) were inverted because I mirrored the object. This doesn't always happen but it is a bug that came from switching between my imac (at my apartment) and the windows computers at school.
Next I modeled the lower arm and hand in low polly and then smoothed the whole model to make it high polly.
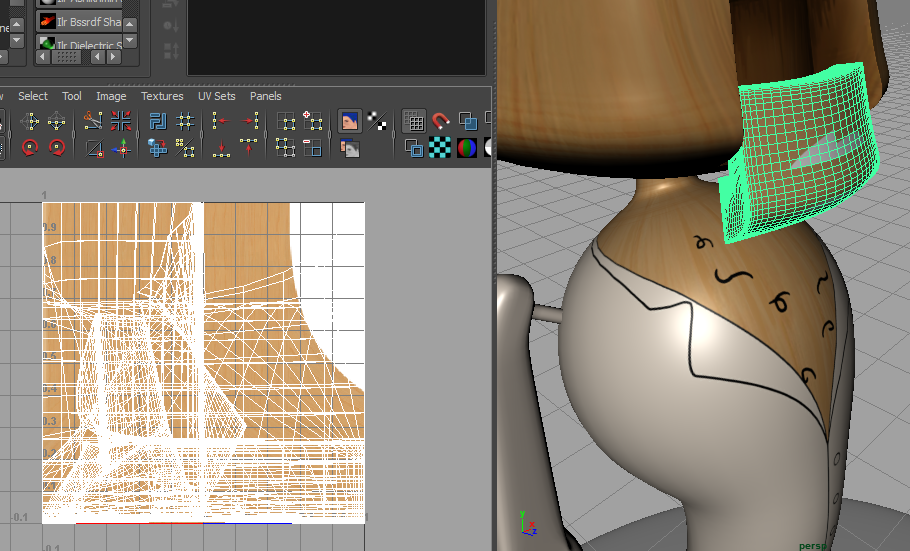
Once the character was smoothed I added the textures by making UV maps and painting textures in Photoshop.
Sadly what I didn't realise is that you shouldn't apply smoothing before you UV map because then if you un-smooth this crap happens. Sucky realisation.
So I went ahead and undid some of my work and redid the texturing on low polly versions of the model. I figured it wouldn't matter if I left a few things high polly. ROOKIE MISTAKE!! MAYA DOESN'T TAKE CRAP FROM THE LIKES OF ME!
MAYA DOES WHAT IT LIKES!!!
So I started rigging. Unaware of the mistakes I had made I went about my business. Everything was going well. I even started getting the controls done.
About 20 crashes and a few mild meltdowns later I decided to restart rigging.
And here we are with a fresh start. I went to previous versions (ALWAYS save your versions) and retrieved low polly versions of my meshes and then re-textured them, then I cleaned up the file and deleted the history.
Back through all the steps of rigging in one evening. I built the skeleton, made the controls did the constraints, made IKs, skinned, weighted, and tested it all. Virtually no issues this time.
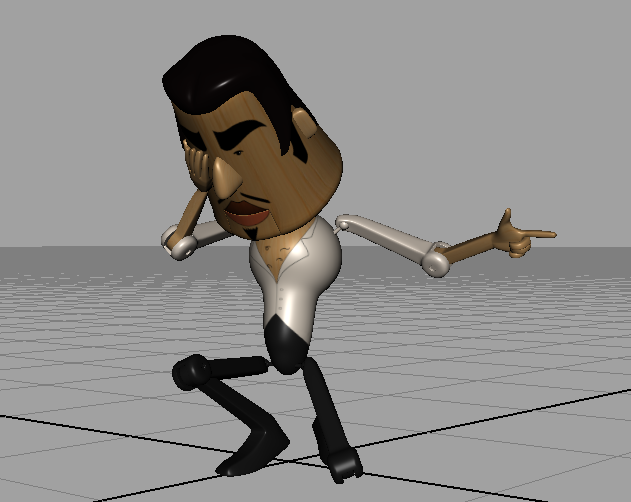
Then I did the finger controls with set driven keys. Shout-out to Jerwin for showing me how, and to Michael for lending me the use of his computer. Then it was time to do a test animation...
What the hell am I doing...
Really what the hell.
Fiiiiinisheeeed.
I made a stage. WOOOO!!
Guess I'm making a Grandma now?? Looks like hell at the moment. Thank goodness to re-using pieces. I'll finish it soon I guess.
So that's pretty much it for now.
Don't judge me, it was a lot of work.
Baii now.